Guides
 Hench Skills
 Guides
How to Change Your Guild Image
Follow these quick steps to prepare a proper icon and upload it in-game via the Guild Manager NPC.
Requirements
- Square image with the same width and height.
- Exact size:
16 × 16pixels. - Format:
24-bit BMP(no alpha/transparent channel). - Rename it to something simple, e.g.
guild.bmp.
You can use any image editor or an online converter to resize and export as a 24-bit BMP.
Place the File
Copy guild.bmp into your game installation folder (default path):
C:\Joyple Games\MixMaster Online\
If you installed the game in a custom location, place the file in that folder instead.
In-Game Steps
-
Talk to the Guild Manager NPC (Jack or Jark). They’re present in all main cities.
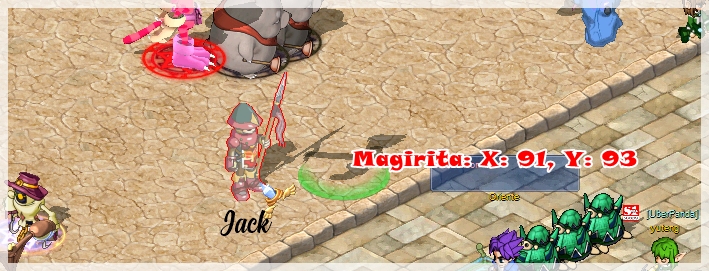
Example: NPC Jack in Magirita. -
Choose the dialog options to set your guild image as shown below.
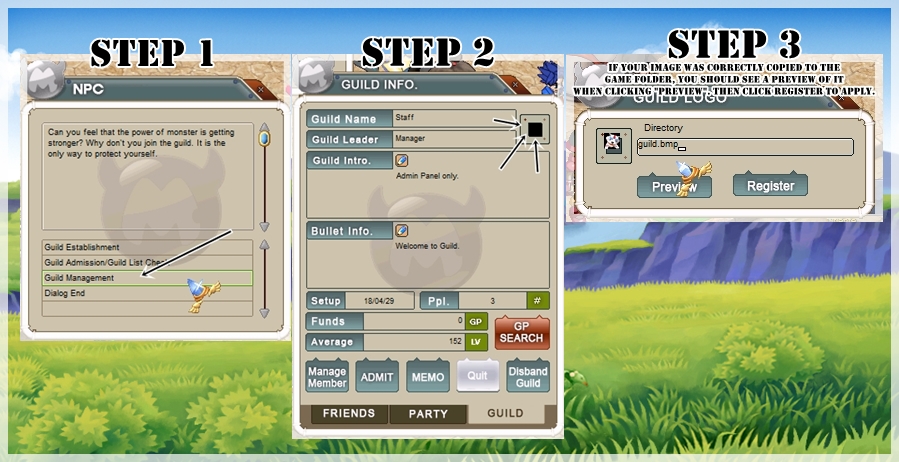
Follow the on-screen options to upload the icon. - When finished, restart the game or reconnect. The guild image should apply the next time you log in.
Pro tip: Keep a master PNG (e.g., 128×128) and export a copy to 16×16 BMP when you need to update the icon.
Not showing? Make sure the file is exactly
16×16, 24-bit BMP, named guild.bmp, and placed in the correct folder. Then reconnect.